How place a second window under other window with VisionOS
This article teaches how you can set the position (the example shows the under / bellow / bottom) of a window based on the position of other window when developing for Vision Pro glass
IOS DEVELOPMENTSWIFTVISIONOS
Eduardo Domínguez Menéndez
3/23/20264 min read
Window placement in visionOS: understanding and customizing Spatial Computing behavior
When working with windows in visionOS, one of the first things you notice is that the system takes strong control over initial placement. Unlike iOS or macOS, where positioning is mostly deterministic, visionOS introduces spatial context driven by the user’s gaze.
Placement of initial window
The very first window your app presents is always positioned relative to where the user is looking. This behavior is forced by the system and it is impossible of change, meaning any attempt to override it using .defaultWindowPlacement is ignored for that initial window.
This makes sense in a spatial environment: the system ensures that content appears exactly where the user’s attention is focused.
Default behavior for subsequent Windows
After the first window, visionOS starts applying its own layout strategy for additional windows: windows are arranged in a stack like formation. Each new window appears:
Slightly closer to the user
With a small offset in X and Y axes
This creates a natural cascading effect in 3D space, maintaining visibility and accessibility without overlapping completely.
Custom placement with .defaultWindowPlacement
To take control over window positioning, you can use the .defaultWindowPlacement modifier on a WindowGroup. This allows you to position new windows relative to existing ones, instead of relying on the system’s automatic stacking.
I teach you how set a custom placement with a code-driven example you can check in the bellow picture. The logic of the example is: place a second window under the first window (the entry point). The frontal initial window contains an information panel and the second window displays a map with landmarks.
How open a second window is outside the scope of this article.
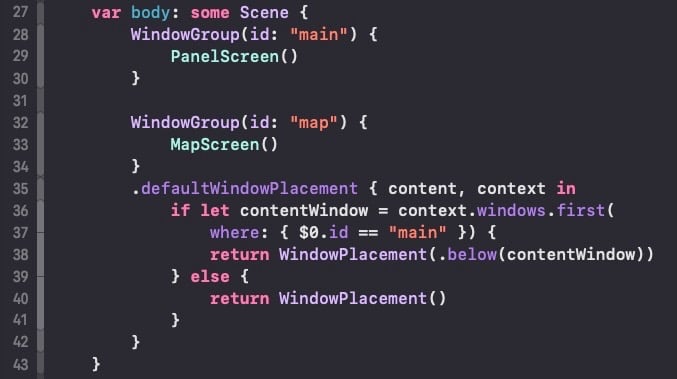
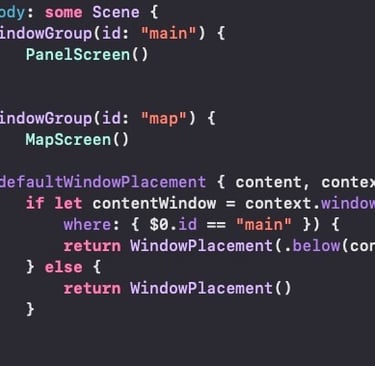
Key elements of the code snippet
Window Identification: It’s essential to assign a unique identifier to each WindowGroup employing the init with "id" parameter and assigning a String. The system uses this identifier to locate the reference window when resolving placement. Without it, you lose the ability to position windows relative to one another. The identification is done on lines 28 and 32, assigning String values "main" for the main window and "map" for the second window that will be displayed in a under relative position.
Apply .defaultWindowPlacement modifier to the WindowGroup you wish to change its default position. Look at line 35.
We set the position on relation to other WindowGroup . Hence, we look up the WindowGroup we will use like reference. The search is done on line 36 with context.windows.first. To execute the search you employ the id you previously assigned on step 1.
The last step is assign the position with a value of WindowPlacement.Position related to retrieved window on step 3. This type of data is generate with the init WindowPlacement(...) on line 38 with code. The parameter stablish the desired position: .below(contentWindow) in our case. There are more possible values (for other positions/relationships) of WindowPlacement.Position :
.above : position relative to the top edge of another window
.below : position relative to the bottom edge of another window
.leading : position relative to the leading edge of another window
.trailing : position relative to the trailing edge of another window
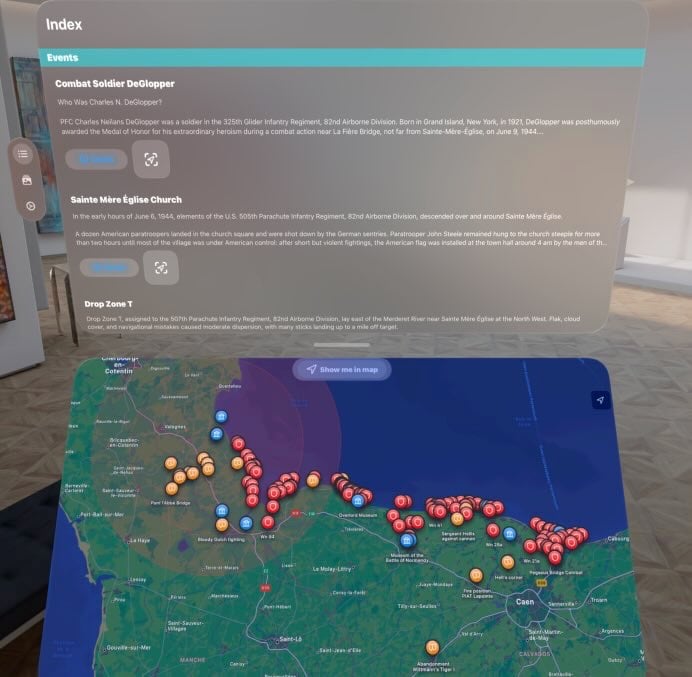
The next picture shows the layout of the previous snippet code. The picture has been generated from Apple Vision Pro simulator of Xcode:

Final considerations and tips
There’s a subtle but frustrating trap when working with window placement in visionOS, especially coming from SwiftUI on iOS. It’s very easy to think in terms of .bottom, because that’s the mental model we’ve built from years of 2D layout work in SwiftUI. So when you want to place a window “under” another, your brain goes straight to code .bottom but:
.below (visionOS spatial computing mindset) → what you’d instinctively think of as .bottom (iOS SwiftUI 2D mindset)
And this confusion is what led me to motivate write this article. I did the error and compiler wasn't a help, even passing the code through to ChatGPT or Claude. The compilation time was endless or displayed the following generic error at the beginning of of the entry point to the app:
"The compiler is unable to type-check this expression in reasonable time; try breaking up the expression into distinct sub-expressions"
To get the solution via .below , I deep into the Developer Documents and examples to find the solution, the old-school problem solving approach.
Special caveat to junior developers: for better understanding I used hardcoded strings for the ids of WindowGroups. On your project you always must assign stable ids with defined String variables to your WindowGroups for better maintainability against changes, so if you change the text of any string nothing breaks. The best practice is write down all the id strings in one place.
Take in mind when you design the flows and interactions of your app that .defaultWindowPlacement is just a definition of initial spatial 3D layout. It only applies when the window first appears. From that point on, the system gives full control to the user, who can move and resize windows freely using built-in interactions.
This also impacts state restoration. When your app relaunches, the system restores each window to its last known size and position, completely ignoring your original placement logic. So don’t rely on .defaultWindowPlacement for persistent layout, it’s not a layout system, it’s a starting point.